Pop-Up Window Dependent Fields
This feature allows you to designate a drop-down choice
field as a decision field which, depending on what choice is selected
by the user, displays a pop-up window with fields that are specific to
that choice. For
example, a field called Error
Message can be displayed in a pop-up window only if the user selects
Software
Error from a Problem
Type field.
Before you begin:
- Before setting up
the Pop-up Window Dependent Fields, you must first create the decision
field and all of the fields that appear in the dependent pop-up windows.
All fields for all dependencies must exist (create new fields on the Administration
| Project | Field
Maintenance page) before you can create dependencies.
In addition, a single drop-down field should be created to be the key
decision field.
- If one of the “subset”
fields appears for multiple dependencies but with different values in
each instance of dependency, create one choice field containing all values
for all dependencies. For example, a field called Version
number can be made containing all of the possible version numbers
for Hardware,
Software,
and Network
problems. The different values for Version
number can be assigned to the different key decision values of
Hardware,
Software,
and Network.
This step is optional.
To designate the
decision field:
- Once the drop down
field is created, select Administration
| Project | Dependencies from the FootPrints
Toolbar.
- On the main Dependencies
page, select Popup
Window Containing Dependent Fields. A
new page is displayed with a drop-down menu.
- From the drop-down
menu, select a decision field from all of the available drop-down fields in the project
and click
 GO.
GO.
Select a decision field for the pop-up window
- To clear the contents of an already
created decision field, select the checkbox next to Remove
all configured pop-up dependencies and click GO. The
top half of the next page allows you to define the dependent fields.
If your decision field has three possible values, a choice box for each
value is displayed, each choice box containing a list of all project fields.
- Highlight
the fields to include for each key value (use the CTRL
key to highlight multiple fields). Only
select the fields for each choice that you want to appear in the pop-up
window. Fields that are not selected continue to appear on the main Create
Issue screen.
Configure field dependencies
The bottom section of this page allows you
to define the behavior of these fields under special circumstances. That
is, the choice you make in the bottom section controls what happens when
a user changes a choice in the decision field after already entering data
into the dependent fields.
- Select one of the
following options:
- When
changing the selected choice of the decision field, retain none of the
values previously entered into the original choice's pop-up window. (the
default, recommended for most configurations)
- When
changing the selected choice of the decision field, retain the values
previously entered into the common fields contained in the original choice's
pop-up window and the current choice's pop-up window.
- When
changing the selected choice of decision field, retain the values previously
entered into all of the fields contained in the original choice's pop-up
window.
This next step is optional.
For
additional drop-down fields found in the project (not including the main
decision field), a series of choice boxes for each of your possible values
is displayed in the bottom half of the page. Continuing
with the above example, for each of your three key values in the decision
field there is a choice box for each choice field in the project.
If there are four choice fields defined (other than the decision field)
in the project, there are twelve choice boxes (four for each of the three
decision values).
By default, all values are selected. You can optionally use one or
more of the fields displayed here to pick different values of the same
choice field for the different values of the decision field. Only
de-select the values for a particular set of fields that you want to limit
(use the CTRL key to highlight multiple fields). Otherwise,
do no de-select any values.
- Select or de-select
the values for those fields that you want to appear in the choice boxes,
depending on the value the user chooses for the key field.
For example, if the key decision field is Problem
type and the sub-field Version
number is displayed for all three of the decision field values,
different values of Version
number can be associated with Hardware,
Software,
and Network.
For example, if version number contains six values, 97,
2000,
2.5,
8.7,
4.x,
and 5.x,
the following associations might be made:
- Choice:
Hardware, Field: Version number—select
2.5
and 8.7
- Choice:
Software, Field: Version number—select
97
and 2000
- Choice:
Network, Field: Version number—select
4.x
and 5.x
All other values for Version
number for each of the three choices above should be de-selected.
All other values for any other fields should remain selected.

Configure Field Dependencies, part2
- After selecting the
values that will appear for each of the choice fields, click “GO”.
Multiple decision fields can be created using the method
above.
Now when you create an Issue, the Issue Information section
contains the decision field. When a value is selected in a decision
field, a pop-up box is displayed, containing the additional dependent
fields for that value. Using our example, if Software
is chosen, Version
number is displayed with the only options being 97
and 2000.
In addition, any other fields associated with Software
(chosen in the top section of the Dependencies screen) are displayed.
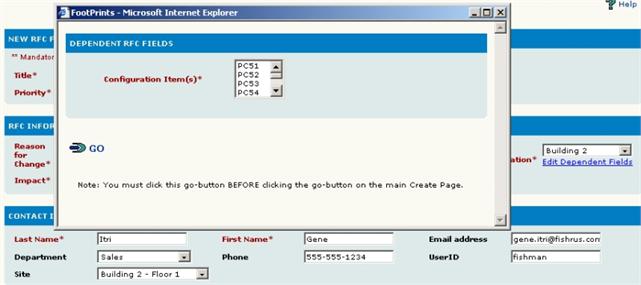
Different fields will appear in the
pop-up window depending on the "Problem Type"