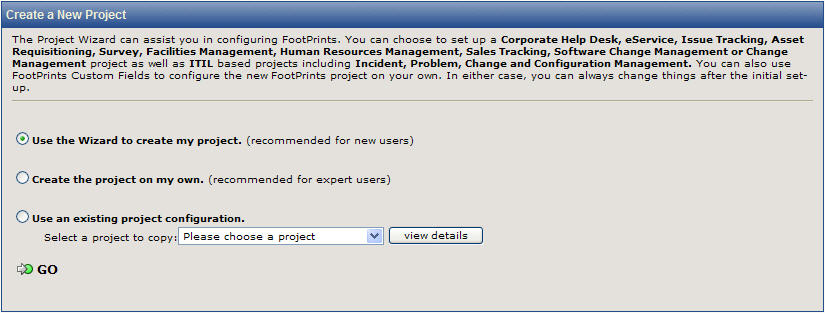
FootPrints provides three options for creating a new Project:
Whichever option is chosen, the Project options can always be changed later. In addition, there is no limit to the number of Projects that can be created in FootPrints.
To create a new Project, choose Administration | System | Projects from the FootPrints Toolbar. The following sections describe each method.
The New Project Setup Wizard walks you through setting up a new FootPrints Project. It includes many of the most popular options and uses for FootPrints, but it does not include all options. If you use the wizard, you can easily go back after you have set up the Project and change or add to your Project settings.
To create a new Project, choose Administration | System | Projects from the FootPrints Toolbar. Under Create A New Project, select Use the Wizard to create my project. Refer to Project Setup Wizard for complete instructions.
Create a New Project
If this option is chosen and  GO is selected, the following information
must be entered:
GO is selected, the following information
must be entered:
After clicking GO, FootPrints
changes to the new Project and displays the Project Administration page.
From there, you can add custom fields, settings, and users to the new
Project.
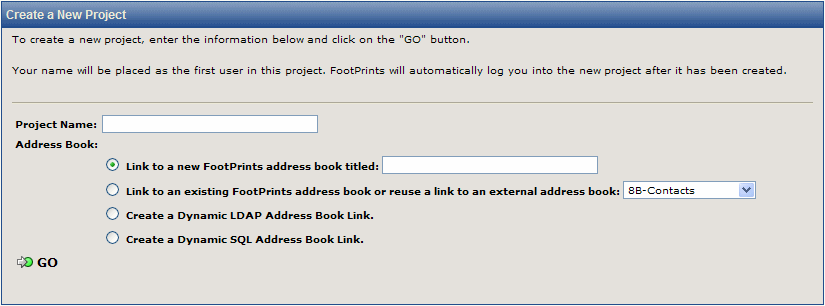
Configure Address Book for the new project
This option allows you to copy the Project fields, Address Book, saved searches and reports, and other custom options from another Project into a new Project.
Note
Copying a Project’s configuration does not copy the Project’s data. It only copies the Project’s custom fields and other settings.
To use this feature:
Note
Clicking the View Details button displays the configuration information for that Project.
GO. GO.The new Project is now created. Click the View
Details button to review the Project configuration, or click GO to go directly to the Project
Administration page for the new Project. From there, you can
add users to the new Project and make any other changes necessary.
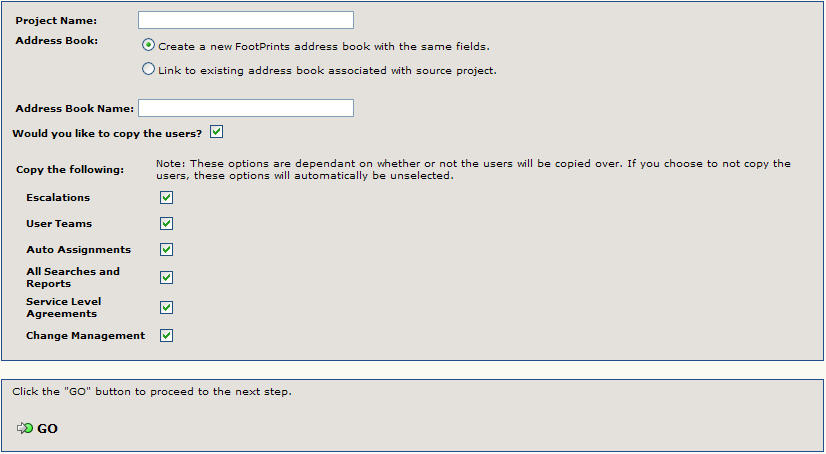
Copy a project configuration